トラッキング コード

2/27/2012

Using a local mirror, repo sync speed up!

Create a local mirror of AOSP
Add repo init option "--mirror".

$ mkdir -p /mirror
$ cd /mirror
$ repo init -u https://android.googlesource.com/mirror/manifest --mirror
$ repo sync

Download time : about 4 hours and over.
volume : 10GB over


Get source from a local mirror

when get source from a local mirror, change repo init url with locla path.

$ mkdir -p android-4.0.3_r1
$ cd android-4.0.3_r1
$ repo init -u /mirror/platform/manifest.git -b android-4.0.3_r1
$ repo sync

I try to get android-4.0.3_r1 branch.

$ repo init -u ../aosp_mirror/platform/manifest.git/ -b android-4.0.3_r1
real 3m18.429s
user 8m21.260s
sys 0m54.990s

when get ICS soruce, time is 3m18s !!
(using SSD, not HDD!)

2/26/2012

Setting up ccache, Because build speed up

http://source.android.com/source/initializing.html#ccache

Put the following in your .bashrc or equivalent.

export USE_CCACHE=1

By default the cache will be stored in ~/.ccache. If your home directory is on NFS or some other non-local filesystem, you will want to specify the directory in your .bashrc as well.

export CCACHE_DIR= "path-to-your-cache-directory"

The suggested cache size is 50-100GB. You will need to run the following command once you have downloaded the source code.
prebuilt/linux-x86/ccache/ccache -M 50G


I measured the build time.

My builing pc spec

SSD:128G
memory:16G
CPU:Corei7 2600
OS:Ubuntu 10.04LTS

Build:1st time

Because creating ccache, do full build of android-4.0.3_r1.
$ . build/envsetup.sh
$ lunch full_maguro-userdebug
$ time make -j8

Time:
real 32m8.076s
user 249m16.350s
sys 13m3.600s

Building:2nd time

Because remove out directory, do "make clean".

$ make clean
$ time make -j8

Time:
real 14m30.814s
user 108m57.690s
sys 7m32.390s


Speed up

Build time speed up, to set Ccache enable!!
32m8.076s -> 14m30.814s

Removed sun-java6 from the Ubuntu Repository

I get new PC!

I try to build setup on Ubuntu 10.04.

$ sudo add-apt-repository "deb http://archive.canonical.com/ lucid partner"
$ sudo apt-get update
$ sudo apt-get install sun-java6-jdk

But, I can not install sun-java6-sdk!!
So,sun-java6-sdk removed from the Ubuntu Repository...

http://www.ubuntuupdates.org/package/canonical_partner/lucid/partner/base/sun-java6


I try to install "LffL Java PPA".
$ sudo apt-get install python-software-properties
$ sudo add-apt-repository ppa:ferramroberto/java
$ sudo apt-get update
$ sudo apt-get install sun-java6-jdk

I cound build for AOSP!!

2/21/2012

Request that the visibility of the SystemBar be changed. For Tablet UI Mode of ICS

Tablet device has Systembar, which resides at the bottom of the screen to provide system navigation controls (Home, Back, and so forth).

If you would like to know NavigationBar for Phone device, Please read my post,
Request that the visibility of the NavigationBar be changed. For Phone UI Mode of ICS.

How to Request that the visibility of the SystemBar for Tablet

To request that the visibility of the SystemBar be changed, you can use View#setSystemUiVisibility().

  1. register Listener to View - View#setOnSystemUiVisibilityChangeListener
  2. set Visivility mode - View#setSystemUiVisibility

Visivility mode:
  • View.SYSTEM_UI_FLAG_LOW_PROFILE  - navigation icons may dim 

View.SYSTEM_UI_FLAG_HIDE_NAVIGATION is not used for Tablet.
Please read Android Developers Page.
http://developer.android.com/intl/ja/sdk/android-4.0.html "Controls for system UI visibility"

Example:


{
                   :
 View view;
 view = findViewById(R.id.linerLayout);
         view.setOnSystemUiVisibilityChangeListener(mOnSystemUiVisibilityChangeListener);
 view.setSystemUiVisibility(View.SYSTEM_UI_FLAG_LOW_PROFILE);
                   :
}

private OnSystemUiVisibilityChangeListener mOnSystemUiVisibilityChangeListener = new OnSystemUiVisibilityChangeListener(){

 @Override
 public void onSystemUiVisibilityChange(int visibility) {
  Log.e("","call onSystemUiVisibilityChange = " + visibility);
 }
};


View.SYSTEM_UI_FLAG_LOW_PROFILE
SystemBar display area of ​​the intact, but appear dimmed.


If you want to know more process in Android Frameworks, check it!!
You can notice that TabletStatusBar do not has a NavigationBarView.

\frameworks\base\packages\SystemUI\src\com\android\systemui\statusbar\tablet
- TabletStatusBar.java

\frameworks\base\packages\SystemUI\src\com\android\systemui\statusbar\tablet
- PhoneStatusBar.java
- NavigationBarView.java

2/19/2012

How to use ListFragment


Android developers Page:
http://developer.android.com/intl/ja/reference/android/app/ListFragment.html


You need to create following files.
  1. Create Layout xml file, if need to use custom Screen Layout with ListView and more widget
  2. Row Layout xml file
  3. ListAdapter Class to make list data


Screen Layout

ListFragment has default ListView. this is mean that you do not should set view.
But, When ListView is no data, Application will display a screen similar to the following.
"Loading" continues to display.


Therefore, you should set custom layout.

Custom layout has ListView object with the id "@android:id/list"
and should has "empty list" with id "android:empty".

Example Layout:

 <?xml version="1.0" encoding="utf-8"?>
 <LinearLayout xmlns:android="http://schemas.android.com/apk/res/android"
         android:orientation="vertical"
         android:layout_width="match_parent"
         android:layout_height="match_parent"
         android:paddingLeft="8dp"
         android:paddingRight="8dp">

     <ListView android:id="@id/android:list"
               android:layout_width="match_parent"
               android:layout_height="match_parent"
               android:background="#00FF00"
               android:layout_weight="1"
               android:drawSelectorOnTop="false"/>

     <TextView android:id="@id/android:empty"
               android:layout_width="match_parent"
               android:layout_height="match_parent"
               android:background="#FF0000"
               android:text="No data"/>
 </LinearLayout>


You can customize the fragment layout by returning your own view hierarchy from onCreateView(LayoutInflater, ViewGroup, Bundle).


public class AppListFragment extends ListFragment {

 @Override
    public View onCreateView(LayoutInflater inflater, ViewGroup container,
            Bundle savedInstanceState) {
        if (container == null) {
            // We have different layouts, and in one of them this
            // fragment's containing frame doesn't exist.  The fragment
            // may still be created from its saved state, but there is
            // no reason to try to create its view hierarchy because it
            // won't be displayed.  Note this is not needed -- we could
            // just run the code below, where we would create and return
            // the view hierarchy; it would just never be used.
            return null;
        }
        

        return inflater.inflate(R.layout.list,null);
    }
}

2/17/2012

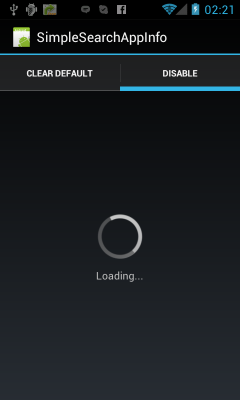
Disable Preinstall Application , Android 4.0.3


Can disable PreInstall Application in Settings->App->App info.
But limited PreInstall.

See Source in Android-4.0.3_r1.

packages\apps\Settings\src\com\android\settings\applications
- InstalledAppDetails.java

    private void initUninstallButtons() {
        mUpdatedSysApp = (mAppEntry.info.flags & ApplicationInfo.FLAG_UPDATED_SYSTEM_APP) != 0;
        boolean enabled = true;
        if (mUpdatedSysApp) {
            mUninstallButton.setText(R.string.app_factory_reset);
        } else {
            if ((mAppEntry.info.flags & ApplicationInfo.FLAG_SYSTEM) != 0) {
                enabled = false;
                if (SUPPORT_DISABLE_APPS) {
                    try {
                        // Try to prevent the user from bricking their phone
                        // by not allowing disabling of apps signed with the
                        // system cert and any launcher app in the system.
                        PackageInfo sys = mPm.getPackageInfo("android",
                                PackageManager.GET_SIGNATURES);
                        Intent intent = new Intent(Intent.ACTION_MAIN);
                        intent.addCategory(Intent.CATEGORY_HOME);
                        intent.setPackage(mAppEntry.info.packageName);
                        List homes = mPm.queryIntentActivities(intent, 0);
                        if ((homes != null && homes.size() > 0) ||
                                (mPackageInfo != null && mPackageInfo.signatures != null &&
                                        sys.signatures[0].equals(mPackageInfo.signatures[0]))) {
                            // Disable button for core system applications.
                            mUninstallButton.setText(R.string.disable_text);
                        } else if (mAppEntry.info.enabled) {
                            mUninstallButton.setText(R.string.disable_text);
                            enabled = true;
                        } else {
                            mUninstallButton.setText(R.string.enable_text);
                            enabled = true;
                        }
                    } catch (PackageManager.NameNotFoundException e) {
                        Log.w(TAG, "Unable to get package info", e);
                    }
                }
            } else {
                mUninstallButton.setText(R.string.uninstall_text);
            }
        }
        // If this is a device admin, it can't be uninstall or disabled.
        // We do this here so the text of the button is still set correctly.
        if (mDpm.packageHasActiveAdmins(mPackageInfo.packageName)) {
            enabled = false;
        }
        mUninstallButton.setEnabled(enabled);
        if (enabled) {
            // Register listener
            mUninstallButton.setOnClickListener(this);
        }
    }


The following System applications can not be disabled.
- Update from Market.
- Application has Activity with Intent.CATEGORY_HOME.(= Launcher Application)
- Application has same signature of System. ( = System Application)


If you set to disable, Application Icon in App List do not show.

2/15/2012

Problem of Custom Notification's Background Color, Android 4.0.3


Show a screenshot above.
ICS has problem of notification's background color, white.


Conditions the problem:
  1. set RemoteViews when Notificaiton created
  2. Application's targetSdkVersion is lower than "9"(=GingerBread).


Cause of the problem

Show frameworks source in Android-4.0.3_r1.

\frameworks\base\packages\SystemUI\src\com\android\systemui\statusbar\phone
- PhoneStatusBar.java


private boolean inflateViews(NotificationData.Entry entry, ViewGroup parent) {
        StatusBarNotification sbn = entry.notification;
        RemoteViews remoteViews = sbn.notification.contentView;
        if (remoteViews == null) {
            return false;
        }
                     :
                     :
                     :
        applyLegacyRowBackground(sbn, content);

        entry.row = row;
        entry.content = content;
        entry.expanded = expanded;
        entry.largeIcon = largeIcon;

        return true;
    }

    void applyLegacyRowBackground(StatusBarNotification sbn, View content) {
        if (sbn.notification.contentView.getLayoutId() !=
                com.android.internal.R.layout.status_bar_latest_event_content) {
            int version = 0;
            try {
                ApplicationInfo info = mContext.getPackageManager().getApplicationInfo(sbn.pkg, 0);
                version = info.targetSdkVersion;
            } catch (NameNotFoundException ex) {
                Slog.e(TAG, "Failed looking up ApplicationInfo for " + sbn.pkg, ex);
            }
            if (version > 0 && version < Build.VERSION_CODES.GINGERBREAD) {
                content.setBackgroundResource(R.drawable.notification_row_legacy_bg);
            } else {
                content.setBackgroundResource(R.drawable.notification_row_bg);
            }
        }
    }
Check to process of setting Notificaion Background Color.
if (version > 0 && version < Build.VERSION_CODES.GINGERBREAD) {
                content.setBackgroundResource(R.drawable.notification_row_legacy_bg);
            } else {
                content.setBackgroundResource(R.drawable.notification_row_bg);
            }


If TargetSdkVersion is lower than Build.VERSION_CODES.GINGERBREAD(APILevel9), set R.drawable.notification_row_legacy_bg!!


Check it!!

\frameworks\base\packages\SystemUI\res\drawable
- notification_row_legacy_bg.xml

\frameworks\base\packages\SystemUI\res\values\
- colors.xml

2/12/2012

How to use Tab mode on ActionBar


ActionBar provide tab navigation which used Fragment System.

Proccess in Activity#onCreate
  1. Set Navigation Mode to ActionBar.
  2. Create tab that is used Action#newTab().
  3. Set TabListener with Fragment to show tab selected.

If you do not want to show Title and Icon, you need to call actionBar.setDisplayShowTitleEnabled(false) and actionBar.setDisplayShowHomeEnabled(false).

public void onCreate(Bundle savedInstanceState) {
  super.onCreate(savedInstanceState);
  // setContentView(R.layout.main);
  // setup action bar for tabs
  ActionBar actionBar = getActionBar();
  actionBar.setNavigationMode(ActionBar.NAVIGATION_MODE_TABS);
  // hide Title and Icon
//  actionBar.setDisplayShowTitleEnabled(false);
//  actionBar.setDisplayShowHomeEnabled(false);

  Tab tab = actionBar.newTab();
  tab.setText("artist");
  tab.setTabListener(new TabListener(this, "artist", ArtistFragment.class) );
  actionBar.addTab(tab);

  tab = actionBar.newTab();
  tab.setText("album");
  tab.setTabListener(new TabListener(this, "album", AlbumFragment.class));
  actionBar.addTab(tab);

 }


Create TabListener with Fragment to show tab selected.

 private class TabListener implements
   ActionBar.TabListener {
  private Fragment mFragment;
  private final Activity mActivity;
  private final String mTag;
  private final Class mClass;

  /**
   * Constructor used each time a new tab is created.
   * 
   * @param activity
   *            The host Activity, used to instantiate the fragment
   * @param tag
   *            The identifier tag for the fragment
   * @param clz
   *            The fragment's Class, used to instantiate the fragment
   */
  public TabListener(Activity activity, String tag, Class clz) {
   mActivity = activity;
   mTag = tag;
   mClass = clz;
  }

  /* The following are each of the ActionBar.TabListener callbacks */

  public void onTabSelected(Tab tab, FragmentTransaction ft) {
   // Check if the fragment is already initialized
   if (mFragment == null) {
    // If not, instantiate and add it to the activity
    mFragment = Fragment.instantiate(mActivity, mClass.getName());
    ft.add(android.R.id.content, mFragment, mTag);
   } else {
    // If it exists, simply attach it in order to show it
    ft.attach(mFragment);
   }
  }

  public void onTabUnselected(Tab tab, FragmentTransaction ft) {
   if (mFragment != null) {
    // Detach the fragment, because another one is being attached
    ft.detach(mFragment);
   }
  }

  public void onTabReselected(Tab tab, FragmentTransaction ft) {
   // User selected the already selected tab. Usually do nothing.
  }
 }

Called the order

When Application launched,Called the order.
onCreate

onTabSelected of "artist"

ArtistFragment#onCreateView


Select Album Tab.
onTabUnselected of "artist"

onTabSelected of "album"

AlbumFragment#onCreateView


Reselect Album Tab.
onTabReselected of "album"

Launch Tablet Mode Android-4.0.3_r1 on Galaxy Nexus (maguro)

Disable config of config_showNavigationBar, because tablet device do not have NavigationBar.
If you want to know detail ,please read my Post.
Phone mode or Tablet mode in Ice Cream Sandwich ?
http://baroqueworksdev.blogspot.com/2012/01/phone-mode-or-tablet-mode-in-ice-cream.html
NavigationBar / Virtual buttons in the System Bar
http://baroqueworksdev.blogspot.com/2012/01/navigationbar.html


device/samsung/tuna/overlay/frameworks/base/core/res/res/values
- config.xml
<!-- Whether a software navigation bar should be shown. NOTE: in the future this may be
         autodetected from the Configuration. -->
<bool name="config_showNavigationBar">true</bool>
↓
<bool name="config_showNavigationBar">false</bool>

Change to LCD Density 160.

device/samsung/tuna
- device.mk
PRODUCT_PROPERTY_OVERRIDES += \
ro.sf.lcd_density=320
↓
ro.sf.lcd_density=160


building ROM
Obtaining proprietary binaries

$ wget https://dl.google.com/dl/android/aosp/imgtec-maguro-iml74k-a796ffae.tgz
$ wget https://dl.google.com/dl/android/aosp/samsung-maguro-iml74k-de1cc439.tgz
$ for i in *maguro-iml74k* ; do tar zxvf $i ; done
$ for i in ./extract-*-maguro.sh ; do $i ; done


build
$ . build/envsetup.sh
$ lunch full_maguro-userdebug
$ make

Flashing a device
$ cd out/target/product/maguro
$ fastboot flashall -w


Launch device.
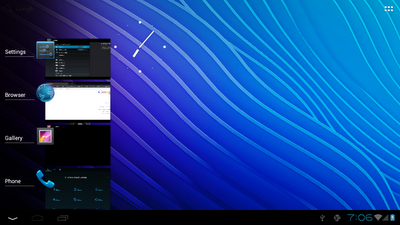
Tablet UI mode on Galaxy Nexus!!


2/11/2012

Building for maguro Android-4.0.3_r1

Building for devices
http://source.android.com/source/building-devices.html

I try to build for maguro Android-4.0.3_r1.
I successed boot of Android_4.0.3_r1 building Rom.

Obtaining proprietary binaries

$ wget https://dl.google.com/dl/android/aosp/imgtec-maguro-iml74k-a796ffae.tgz
$ wget https://dl.google.com/dl/android/aosp/samsung-maguro-iml74k-de1cc439.tgz
$ for i in *maguro-iml74k* ; do tar zxvf $i ; done
$ for i in ./extract-*-maguro.sh ; do $i ; done


build
$ . build/envsetup.sh
$ lunch full_maguro-userdebug
$ make

Flashing a device
I try to flash only system.img and boot.img, but devices is reboot loop.
So, You shoud read Offical Pag "Building for devices".

flash command is
$ fastboot flashall -w


Do not use extract-files.sh ?

Yout want to know detail, you shoud read android-building thread.

Camera not working on ICS 4.03 / Maguro
http://groups.google.com/group/android-building/browse_thread/thread/a6bdd53547c0af62/b84f5731198d605a?lnk=gst&q=extract-files.sh&pli=1

extract-files.sh is my own private tool
anyway, used during development of the self-extractors, it's not meant
to be used by the general public, especially because of licensing
issues.

2/08/2012

Building for wingray Android_4.0.3_r1 - Motorola Xoom (US Wi-Fi)

wingray is building name of "Motorola Xoom (US Wi-Fi)".

Reference WebPage

http://source.android.com/source/building-devices.html
http://code.google.com/intl/ja/android/nexus/drivers.html


Obtaining "proprietary binaries"

You need to obtain "proprietary binaries" which is not include the Android Open-Source Project.
To run the script for obtaining device's "proprietary binaries"

Get "proprietary binaries".
$ wget https://dl.google.com/dl/android/aosp/broadcom-wingray-iml74k-2c8a74c6.tgz
$ wget https://dl.google.com/dl/android/aosp/nvidia-wingray-iml74k-e5226417.tgz
$ for i in *wingray-iml74k* ; do tar zxvf $i ; done
$ for i in ./extract-*-wingray.sh ; do $i ; done

building the configuration that matches a device

running to build for wingray.

$ . build/envsetup.sh
$ lunch full_wingray-userdebug
$ make

Create AOSP via recovery

This works on AOSP master branch, do not work Android-4.0.3_r1 etc.

If you want to know detail, you shoud read Android-building's thread.

https://groups.google.com/group/android-building/browse_thread/thread/1d0f4fea5a577f93/8c698abb96533a97?#8c698abb96533a97

# Create a directory to store all the temporary files
mkdir -p ~/aosp-ota-exp

# Download all the IML74K maguro binaries from
# https://code.google.com/android/nexus/drivers.html into ~/aosp-ota-exp
wget https://dl.google.com/dl/android/aosp/imgtec-maguro-iml74k-a796ffae.tgz
wget https://dl.google.com/dl/android/aosp/samsung-maguro-iml74k-de1cc439.tgz


# download the ICL53F yakju factory image from
# https://code.google.com/android/nexus/images.html into ~/aosp-ota-exp
wget https://dl.google.com/dl/android/aosp/yakju-icl53f-factory-89fccaac.tgz

# download the matching stub target_files.zip directly from
wget https://dl.google.com/dl/android/aosp/stub-yakju-target_files-icl53f.zip

# Extract the proprietary binaries
for i in ~/aosp-ota-exp/*maguro-iml74k* ; do tar zxvf $i ; done
for i in ./extract-*-maguro.sh ; do $i ; done 

# Extract the individual factory images
(cd ~/aosp-ota-exp ; tar zxvf yakju-icl53f-factory-89fccaac.tgz)
(cd ~/aosp-ota-exp/yakju-icl53f ; unzip image-yakju-icl53f.zip) 

# Patch the OTA-packaging tool
repo forall build -c 'git pull https://android.googlesource.com/platform/build refs/changes/64/31464/1' 

# Set up the build. Insert dummy files where the original files should be preserved
wget https://dl.google.com/dl/android/aosp/imgtec-maguro-iml74k-a796ffae.tgz
wget https://dl.google.com/dl/android/aosp/samsung-maguro-iml74k-de1cc439.tgz
for i in  *maguro-iml74k* ; do tar zxvf $i ; done
for i in ./extract-*-maguro.sh ; do $i ; done 

. build/envsetup.sh
lunch full_maguro-userdebug
make installclean 
for i in vendor/firmware/bcm4330.hcd vendor/etc/sirfgps.conf vendor/lib/hw/gps.omap4.so vendor/lib/libinvensense_mpl.so vendor/firmware/libpn544_fw.so vendor/firmware/ducati-m3.bin ; do mkdir -p out/target/product/maguro/system/$(dirname $i) ; echo "DUMMY AOSP FILE" > out/target/product/maguro/system/$i ; done 

# Do the build (this is a dist build, not a plain build)
# Dist: out/dist/full-apps-eng.XXXXX.zip
# Dist: out/dist/full-emulator-eng.XXXXX.zip
# Dist: out/dist/full-target_files-eng.XXXXX.zip
# Dist: out/dist/full-symbols-eng.XXXXX.zip
time make -jX dist


# Create the OTA package and the custom cache partition
rm -rf ~/aosp-ota-exp/cache
mkdir -p ~/aosp-ota-exp/cache
build/tools/releasetools/ota_from_target_files -w -i ~/aosp-ota-exp/stub-yakju-target_files-icl53f.zip -k build/target/product/security/testkey out/dist/full_maguro-target_files-eng.*.zip ~/aosp-ota-exp/cache/aosp_update.zip 
make_ext4fs -s -l 209715200 -a cache ~/aosp-ota-exp/cache.img ~/aosp-ota-exp/cache 


# Flash the device
fastboot flash bootloader ~/aosp-ota-exp/yakju-icl53f/bootloader-maguro-primekk15.img
fastboot reboot-bootloader
fastboot flash radio ~/aosp-ota-exp/yakju-icl53f/radio-maguro-i9250xxkk6.img
fastboot reboot-bootloader
fastboot flash system ~/aosp-ota-exp/yakju-icl53f/system.img
fastboot flash boot
fastboot flash recovery
fastboot flash cache ~/aosp-ota-exp/cache.img 

# Boot into recovery (in the bootloader, navigate with volume up/down, and select with the power button)
# Get the recovery menu (hold power, press volume up)
# In recovery, apply /cache/aosp_update.zip, wipe the cache, and reboot.* 


Display About phone.
Android version is "4.0.3.0.2.0.1.0", count down???


Display Application list .
There is not GMS apps, Market etc.


WiFi work on. Connected to Google Top!!

2/07/2012

Don't work WIFI and Bluetooth on Galaxy Nexus ICS 4.0.3 ?

I don't try to build Android-4.0.3 for Galaxy Nexus.
Don't work WIFI and Bluetooth on Galaxy Nexus ICS 4.0.3 ?

Galaxy Nexus Android ICS and Bluetooth/Wifi drivers
https://groups.google.com/group/android-building/browse_thread/thread/d0294450823d093d/6470de50e54e600d?lnk=gst&q=android+4.0.3#6470de50e54e600d
We're still working on getting a license to distribute the Wifi/BT firmware
for Galaxy Nexus.

In the meantime, please try this and let me know if it works for you:
http://goo.gl/8jit8

2/05/2012

ScreenShot in ICS Android frameworks

Screenshot Proccess in Android Frameworks

Call interceptKeyBeforeQueueing from Navite Layer InputDispatcher 
InputManager#interceptKeyBeforeQueueing
 - PhoneWindowManager#interceptKeyBeforeQueueing
  - interceptKeyBeforeQueueing
    - interceptScreenshotChord()
      - mScreenshotChordLongPress#run
        - takeScreenshot()
            TakeScreenshotService of new Service in SystemUI
            - run()
              - GlobalScreenshot#takeScreenshot
                called Surface.screenshot to get Bitmap
                Animation and Save Screen Image!!


Check source!!


\frameworks\base\services\input
- InputDispatcher.cpp
- InputManager.cpp

\frameworks\base\policy\src\com\android\internal\policy\impl
- PhoneWindowManager.java

\frameworks\base\packages\SystemUI\src\com\android\systemui\screenshot
- GlobalScreenshot.java
- TakeScreenshotService.java


2/04/2012

Request that the visibility of the NavigationBar be changed. For Phone UI Mode of ICS

Application can request that the visibility of the NavigationBar be changed.
But, be careful of timing be released from the Frameworks.

How to Request that the visibility of the NavigationBar

To request that the visibility of the NavigationBar be changed, you can use View#setSystemUiVisibility().

Android Developer: View#setSystemUiVisibility()

  1. register Listener to View - View#setOnSystemUiVisibilityChangeListener
  2. set Visivility mode - View#setSystemUiVisibility

Visivility mode:
  • View.SYSTEM_UI_FLAG_LOW_PROFILE  - navigation icons may dim 
  • View.SYSTEM_UI_FLAG_HIDE_NAVIGATION - hide navigation icons


Example:

{
                   :
 View view;
 view = findViewById(R.id.linerLayout);
         view.setOnSystemUiVisibilityChangeListener(mOnSystemUiVisibilityChangeListener);
 view.setSystemUiVisibility(View.SYSTEM_UI_FLAG_HIDE_NAVIGATION);
                   :
}

private OnSystemUiVisibilityChangeListener mOnSystemUiVisibilityChangeListener = new OnSystemUiVisibilityChangeListener(){

 @Override
 public void onSystemUiVisibilityChange(int visibility) {
  Log.e("","call onSystemUiVisibilityChange = " + visibility);
 }
};


View.SYSTEM_UI_FLAG_LOW_PROFILE
NavigationBar display area of ​​the intact, but appear dimmed.


View.SYSTEM_UI_FLAG_HIDE_NAVIGATION
Hide the display area of ​​the NavigationBar becomes completely, spread the display area of ​​the application.


Timing be released from the Frameworks

NavigationBar display specifiers will be released in the following use cases.
  • TouchDown on Screen
  • Show PowerDown Dialog(GlobalActions)
  • An application becomes active/inactive

Get the Factory Image of Galaxy Nexus

You can get the Factory Image of Galaxy Nexus.

Google Support for Nexus Phones and Flagship Devices.
 http://code.google.com/intl/ja/android/nexus/images.html


Example of 4.0.2 (ICL53F) maguro
wget https://dl.google.com/dl/android/aosp/yakju-icl53f-factory-89fccaac.tgz
tar xvf ./yakju-icl53f-factory-89fccaac.tgz
cd yakju-icl53f
./flash-all.sh

2/02/2012

is Displayed NavigationBar?

The following modules are available in the Frameworks.
PhoneWindowManager#hasNavigationBar()
WindoManagerService#hasNavigationBar()

Check whether there are sources that use this module!!
you can find ViewConfiguration class.

public class ViewConfiguration {
    private ViewConfiguration(Context context) {
             :
        if (!sHasPermanentMenuKeySet) {
            IWindowManager wm = Display.getWindowManager();
            try {
                sHasPermanentMenuKey = wm.canStatusBarHide() && !wm.hasNavigationBar();
                sHasPermanentMenuKeySet = true;
            } catch (RemoteException ex) {
                sHasPermanentMenuKey = false;
            }
        }
             :
    }

    public boolean hasPermanentMenuKey() {
        return sHasPermanentMenuKey;
    }
}

hasPermanentMenuKey() is check "Permanent Menu Key is available."
sHasPermanentMenuKey to determine the value under the following conditions.
wm.canStatusBarHide() : Phone UI or Tablet UI
wm.hasNavigationBar() : Navigation is enable /disable

Tablet UI is disable NavigationBar.
If NavigationBar is disable, sHasPermanentMenuKey is true.
If NavigationBar is enable, sHasPermanentMenuKey is false.

so, you can check using under cord.

//hasPermanentMenuKey == true -> NavigationBar is disable
//hasPermanentMenuKey == false  ->  NavigationBar is enable
boolean isNavigationBar = ! ViewConfiguration.get(this).hasPermanentMenuKey();

Enable NavigationBar on Emulator

How to Enable NavigationBar on Emulator

Standard ICS is not enable NavigationBar. but, Android Frameworkds is see Emulator settings.

        // Allow a system property to override this. Used by the emulator.
        // See also hasNavigationBar().
        String navBarOverride = SystemProperties.get("qemu.hw.mainkeys");
        if (! "".equals(navBarOverride)) {
            if      (navBarOverride.equals("1")) mHasNavigationBar = false;
            else if (navBarOverride.equals("0")) mHasNavigationBar = true;
        }


You can add "hw.mainkeys" from Edit AVD.


Procedure:
  1. add "Hardware Back/Home keys frome "New" button.
  2. change value to "no".


Start AVD!!